If you know me, you know I am a geeky sort. I like all things to do with computer software and development. I keep up with all the goings on as much as any one person can. When I learned I could write Python scripts to run on my Raspberry Pi, inside of Minecraft, well, I just had to start playing. This is known as Minecraft: Pi Edition (or MCPI for short). First, let me define each of these terms, in case they’re new to you:
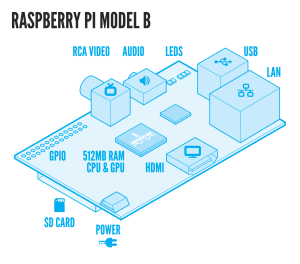
 Raspberry Pi – A credit card sized computer on a single circuit board which you can pick up for less than $100, including, all the parts that go with that circuit board. This thing is a wonderful example of innovation in the 21st Century in that it brings software development within reach of a lot of people who might otherwise never have the chance to try it out. The computer is cheap and it is very easy to setup. The company making the Pi has sold more than two million of these little things now and it seems there are nearly as many uses for them. This Ars Technica article lists just ten to give you an idea of the variety of uses out there.
Python – A neat programming language which is currently the default language for beginners to learn. There are TONS of people playing around with Python online and pushing it in wonderful new directions. Python is easy to learn, especially for young people or anyone who has never written a computer program before. It is mostly forgiving of new coder mistakes and so eases the learning curve quite a bit. I’ve been learning it for a few years now, so this was a really cool opportunity for me to extend my learning in a new way.
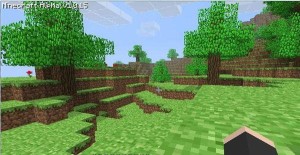
 Minecraft – A massively popular video game from a Swedish company called Mojang. It’s a deceptively simple block-building game that’s been around a few years now. Here’s is a link to one of the first videos I watched a few years ago on how to survive your first night in the game. Mojang released a version of Minecraft specifically for the Raspberry Pi earlier this year and that’s what this blog post is all about. MC now has a huge community of very active players and coders, creating all sorts of modifications and creations using the game as a platform. It’s so open-ended in fact, that you’ll see it used in universities and elementary schools alike for learning many different disciplines (from basic math to architecture). I believe this game will be viewed in years to come as the most important thing to come out of the 2010 decade.
When you play Minecraft on a PC or Mac, you run the game and then you are inside the virtual Minecraft world the whole time you’re playing. You can click here and there to create wonderful structures with whatever comes into your imagination. It’s sort of like having an almost infinite selection of Lego blocks to play with. With Minecraft: Pi Edition though, you get that plus the ability to interact with the virtual world via commands you execute in a Python script. This opens the possibility of creating things very quickly via code that would take a lot longer to make by hand and turns out to be a really cool way to learn to code.
For example, say you want to make a building with five stories, glass windows and a solid gold roof. You can do that in the PC-version of Minecraft, but to do so you will be clicking each and every block into place, one at a time. With the Pi edition of MC though, you can write a script with loops for each floor, and commands like setBlock() which will do the clicking for you. The version of Minecraft that Mojang released for the Pi is a limited version of the so-called Pocket Edition though, so it’s not able to do everything the PC versions can, but that’s really OK. The point here isn’t to play Minecraft; it’s to have fun writing scripts in Python and to learn how to program.
There are a lot of good pages online already showing you how to setup MCPI so I’ll just link you to this one from here.
There are some additional notes I wish had been made clearer when I was first starting:
- You can’t run Minecraft on the Pi via remote access software like RDP or VNC. For some reason, the graphics don’t carry through. You have to connect the Pi to a regular monitor and use it that way.
- Once you have your Pi setup to run MC, you will end up with a few windows open:
- Minecraft
- your text editor, like Leafpad
- A Terminal window so you can your Python commands
- Because of this, I found it most useful to have my text editor in a separate virtual desktop (which is a neat feature in Linux X-Windows desktops)
My workflow then went something like this:
- Open a LX Terminal window (like a DOS Command window in Windows)
- CD in there to the folder I will store my Python scripts in, which for me was:
- /home/pi/mcpi/api/python
- Run Minecraft from my Desktop shortcut.
- Create a new World or open an existing one.
- Move to a place with a clear landscape, but not too far from the spawn point.
- Alt-Tab away from MC and open Leafpad.
- Create a new script, or open an existing file. Save the scripts into the folder above.
- Alt-Tab back to the Terminal and run the script with a command like, “python script.py”.
- Alt-Tab into the MC window to see whether my script worked or not.
With this being my first time playing around with this, I decided to run a few scripts I found online, to see how they work. I started with this site’s Auto Rainbow script, which creates a huge rainbow across the landscape in your world. It worked just fine after just a little bit of editing (the indents are off a little and Python hates that), so once I fixed the code, I knew this was going to be really cool. Next, I started playing with the variables like the height in that script until I felt I had the hang of working with the API.
I then decided I would create a house from scratch with all my own Python code. After a lot of trial and error, I got it just right. I used the tip I learned here to get the player’s current position, since it was a bit of a hassle always creating things based on the spawn point. I would move around and then not see whatever the script had built, since MC only shows you a limited view of the landscape whenever you’re walking around your world.
Here’s my first “house” script then, for reference:
import mcpi.minecraft as minecraft
import mcpi.block as block
from math import *
import time

mc = minecraft.Minecraft.create()
pos = mc.player.getTilePos()
mc.postToChat("pos is " + str(pos.x) + " " + str(pos.y) + " " + str(pos.z))

width = 10    # like x
depth = 10    # like z
maxHeight = 20

# clear as air
for x in range(1, width+5):
    for y in range(0, maxHeight):
        for z in range(1, depth+5):
            mc.setBlock(pos.x+x,pos.y+y,pos.z+z,block.AIR)

mc.postToChat("Cleared with air...")

#floor
for x in range(1, width):
        for z in range(1, depth):
            mc.setBlock(pos.x+x,pos.y-1,pos.z+z,block.WOOD)

#walls
for z in range(1, depth):
    mc.setBlock(pos.x+1,pos.y,pos.z+z,block.STONE)
    mc.setBlock(pos.x+width,pos.y,pos.z+z,block.STONE)

    mc.setBlock(pos.x+1,pos.y+1,pos.z+z,block.GLASS)
    mc.setBlock(pos.x+width,pos.y+1,pos.z+z,block.GLASS)
    mc.setBlock(pos.x+1,pos.y+2,pos.z+z,block.GLASS)
    mc.setBlock(pos.x+width,pos.y+2,pos.z+z,block.GLASS)

    mc.setBlock(pos.x+1,pos.y+3,pos.z+z,block.STONE)
    mc.setBlock(pos.x+width,pos.y+3,pos.z+z,block.STONE)

for x in range(1, width):
    mc.setBlock(pos.x+x,pos.y,pos.z+1,block.STONE)
    mc.setBlock(pos.x+x,pos.y,pos.z+depth,block.STONE)

    mc.setBlock(pos.x+x,pos.y+1,pos.z+1,block.GLASS)
    mc.setBlock(pos.x+x,pos.y+1,pos.z+depth,block.GLASS)
    mc.setBlock(pos.x+x,pos.y+2,pos.z+1,block.GLASS)
    mc.setBlock(pos.x+x,pos.y+2,pos.z+depth,block.GLASS)

    mc.setBlock(pos.x+x,pos.y+3,pos.z+1,block.STONE)
    mc.setBlock(pos.x+x,pos.y+3,pos.z+depth,block.STONE)

# ceiling
for x in range(1, width+1):
    for z in range(1, depth+1):
        mc.setBlock(pos.x+x, pos.y+4, pos.z+z, block.GOLD_ORE)
I believe that will require a little explanation:
- First, we have to import a few external libraries to make writing our script easier, including the minecraft API and a few others.
- I use the postToChat() API in a few places to make little debugging messages appear within MC so I know where we are in the script as it runs in the background.
- Next, I create an instance of the Minecraft class as “mc” and then get the player’s current position in the world.
- Positions are expressed as three integers: x and y a z coordinates.
- Next, I “clear” the blocks in the area where I want to draw by setting them to the “air” or empty block type.
- Then I “draw” the floor by using the setBlock() API for a given range of coordinates to the Wood block type.
- Then I draw the walls the same way, but using the Stone and Glass blocks.
- I top it all off with the Gold Ore block type for the roof og my now one story tall house.
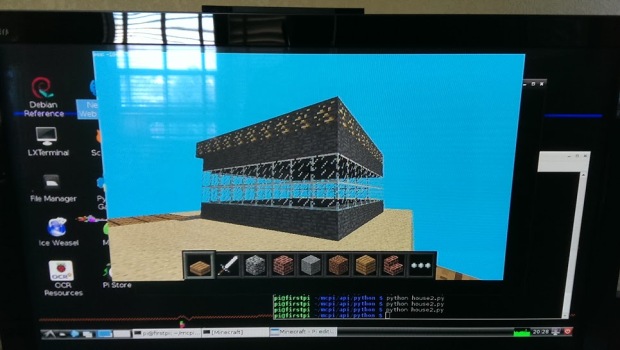
Here’s what the House looks like after it’s built by the script (which only takes a few seconds):
It was really not hard to learn and I think, with most kids in the 10-12 age range already being Minecraft fanatics, this would make a fantastic way to teach kids about programming in a really fun way. I’ll have to try teaching some of this to my own 12-year-old next.
Many, many thanks to the Raspberry Pi Foundation for their awesome computer and to Mojang for making MCPI available for free.
🙂
